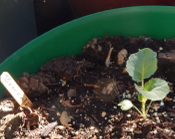
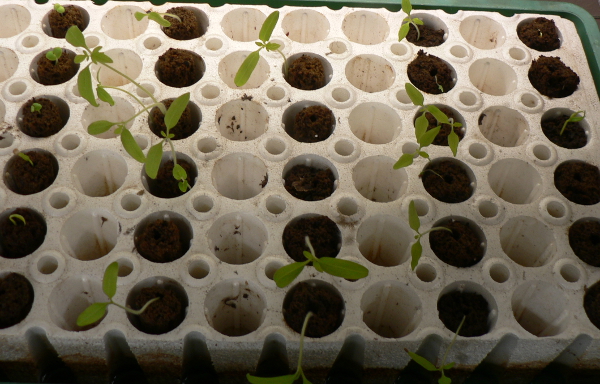
10/1/2016 ~ The seed starting kit worked really well. I’ve put the carrots, broccoli, kale and cabbage outside in their own containers. The broccoli had really long roots: six to eight inches.
I think I should have transplanted the seedlings a week, even two weeks and ago.
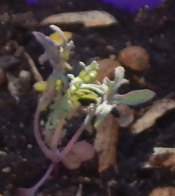
The kale’s roots were very different from those of the broccoli. The kale roots had attached themselves to something at the bottom of their cell, so I had to sort of rip the little plant and it’s soil out.
The kale took longer to recuperate from transplanting, by about a day, than the broccoli.
The cabbage had very little visible root system.
The carrots surprised me. One had a long central root, but another’s long root was like a corkscrew. I have no idea why. And another was also a bit weird, but not so precisely cork screw looking.
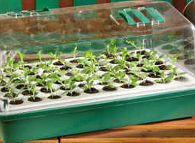
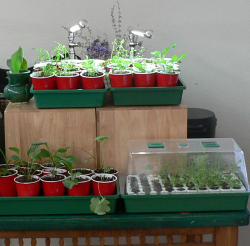
9/5/2016 ~ I ordered a new Seed Starting System from Burpee. It’s a lower profile than my old Park System, so it will fit under a plant stand on my candle making table. Another plus, is that it has a reservoir and a wicking mat so that you don’t have to water every day.
You can watch me set it up.
Tabletop Greenhouses
One of the first things I noticed upon arriving in England, not counting the red chimney pots on every single roof, which I saw from the plane window, was greenhouses ~ So many greenhouses! As soon as you take a train in England you are able to see back yards, and many of have a greenhouse.
I don’t remember ever seeing a personal greenhouse in Stevens Point, Wisconsin, where I grew up. Sorenson’s, the Florist, had a greenhouse, but that was it.
Near Chapel Market in Islington, where I lived in London, there was a little general store type shop that carried red clay pots, trowels, seed starter soil mix and these totally new to me tabletop greenhouses. I loved them. I loved the seed starter soil mix less, since mine came complete with some sort of white worms that ate my seedlings. It was like a seed tray of Lockness Monsters: There would be a seedling, all up and happy, then this white worm would emerge and swallow up the little plant. And here I’d thought Pfizer was a name to be trusted.
In those days in England the mini greenhouses were advertised as a way to propagate begonias. You were given directions on cutting a begonia leaf and setting pieces on your potting soil. With the mini greenhouse dome in place, there was enough humidity for the pieces to root. I tried it, and sure enough, it worked.
When I shipped my mini greenhouses to Santa Fe, hoping to use them upon my return, they all cracked rather severely. So, I ordered 5 Bio Domes from Park’s. Given 5 Bio Domes is enough to grow 300 seedlings, I don’t think I’d quite thought it out, or, I hadn’t expected such a high rate of germination. In fact, nearly every single seed germinated. I don’t recall one single seed that left its cell empty by failing to germinate.
I’m not a fan of the little sponges that Park Seeds uses. They are forever reappearing in my garden. If one wants to look at them optimistically, they last a long time. I boiled many and reused them.
Perhaps what makes the little sponges most attractive is that they are really easy to pry out of the cells and they hold the young roots really well while transplanting. To help me transplant I used some plaster of Paris tools I had from craft projects ~ they were diminutive spatulas, trowels and “knives”.
1/30/2014 ~ My plan for today is to plant some tomato seeds in my tomato planter, using some long bolts to convey heat from the two bulb T5 (I think) lamp into the soil, hopefully Deep into the soil.
The light is from my Aqueon Planted Aquarium. I’m not using it for the aquarium because I need all my electricity to keep my lamps alight for my plants. The light is one of my favorites for adding heat to my living room in the winter, so I’m hoping the heat can be transferred deeper into the soil, than the soil’s surface, so that even without a clear plastic cover the seeds have the warmth to germinate. Humidity… not so easy to provide under the circumstances.
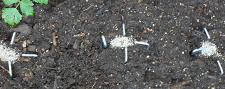
The soil in my tomato planter (from Plow and Hearth) is a mix of composted mulch, rock dust (Azomite) and previously used soil. I tamped the soil down and watered it with water I took from my goldfish aquarium, hoping that would put additional nitrogen in the soil. Then I put three long bolts with eye heads into place, and for each set of tomato seeds I added three L shaped stakes that came with my Pop-Up Greenhouse.
To get an idea of how much additional heat I could get for my plants from the Aqueon aquarium light, I took a temperature reading before I went any further. The temperature of the soil’s surface ranged from 47* to 49*.
After I added the Aqueon aquarium light (not to worry, my goldfish are getting a larger aquarium with an LED light) and it had been on for half an hour I took another temperature reading. The temperature of the soil’s surface had gone up to 53* to 54*. It varied in different locations. I’m not sure why. After the light had been on for a few hours the temperature read pretty consistently 57* over the soil’s surface.

I also planted Hundreds and Thousands tomato seeds today, but much more conventionally, in my bio dome. I’m very curious to see how germination times compare.
I ordered the seeds from aprilshowers2010 on Ebay. She does a beautiful job of packaging her seeds and sending useful information with them.
I wanted to plant more seeds from the original tomatoes from Peru, but I’m still finding armadillo bugs in the pot. Since they made a quick snack of my last original tomato seedlings, I’m putting off planting more till I can put a elm seedling into the pot and nothing eats it overnight.
2/19/2014 ~ None of the tomatoes I planted on 1/30/2014 have come up, so far. It may be that I didn’t keep the soil moist enough, or perhaps it wasn’t warm enough, even with the light on and the L-shaped metal going into the soil.
Armadillo Bugs ~ I have continued to find them in my pots ever since my last post, that’s for over two weeks. I collect them and put them into a coffee tin with soil. I feed them a tad, since my aim isn’t to kill them, but to have them be someplace where they won’t be eating my seedlings and plants.
I emptied the tin of armadillo bugs outside today, in a sunny part of the garden. In the shade, I think they multiply too quickly. In fact, three of my foxgloves appear to be gone, right where I’d been throwing armadillo bugs instead of putting them into the tin. The foxgloves were under my ponderosa pine, so that’s pretty shady.
If there isn’t a tomato up tomorrow, I’ll plant more seeds.
3/1/2014 ~ No tomatoes sprouted. I didn’t plant more seeds because it seemed to me a part of the problem, if not the main problem, was lack of humidity.
NOTE ~ When my indoor temperature was above 55* at night my tomatoes began sprouting. If I had left my Aqueon light on overnight, I think it would have worked, but my solar electric batteries were worn out and didn’t support that.
3/15/2014 ~ With my goldfish happily in their new aquarium, with lots of plants for them to nibble, I’m finally able to get back to my indoor gardening.
I’ve dusted out one of my Park’s Bio Domes, filled alternating rows with sponges (all salvaged from unsuccessful starts ~ mostly caused by me failing to plant out the seedlings at an appropriate time), added water to moisten the sponges and now I’m waiting for wax to melt so that I can make candles to use in Flower Pot Heating under the Seedlings. My home is too cold at this time of year, averaging about 52*, for seeds to germinate without some added heat.
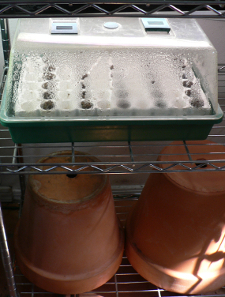 3/16/2014 ~ It’s gotten a bit steamy inside my Bio Dome. I’ve opened the vents on the top, which will help. However, until the seeds have sprouted it’s probably okay to have a lot of humidity. After they sprout, not so much since seedlings are prone to “damping off” ~ that is, dying from too much humidity.
The lamp above the Bio Dome is an Aqueon Aquarium T5 light with 2 bulbs/lamps. One of the lamps has additional red in its spectrum of light, which is supposed to be good for aquarium plants. I figure it’s probably good for all plants. My understanding is that it encourages plants to grow. Though, too much can result in tall spindly plants instead of strong, stocky ones. We’ll see.
When I took an infrared thermometer temperature reading of the dark brown sponges, each of which holds a seed, they came in at 64.5*. They weren’t that warm until I turned on the lamp this morning. The Flower Pot Heating appears to keep them above room temperature, but not much. My room temperature is 53* to 54*. That’s too cold for tomato and pepper seeds to want to sprout.
Sprouting seeds using a Bio Dome in the past has always worked really well for me. Other methods have also worked, but this last winter I had armadillo bugs in my soil, most likely they were in the compost which doesn’t get hot enough to kill them. The bugs ate my seedlings. It was pretty depressing to have lovely seedlings one day, then a munched seedling lying on the soil the next day, with armadillo bugs surrounding the feast.
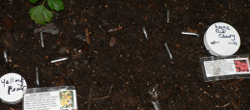
I planted the seeds from left to right, starting with an Empty Row:
Empty Row
Pepper Sweet Pickle ~ 3 Basil ~ 3
Empty Row
Tomato Red Currant ~3 Tomato Yellow Pear ~3
Empty Row
Tomato Large Red Cherry ~5
Empty Row
Tomato Hundreds & Thousands ~6
Empty Row
Pepper Ancho ~3 Pepper Sweet Banana ~ 3
3/22/2014 ~ Two of the Yellow Pear tomatoes have sprouted. Both are in the same cell. I dropped two seeds and couldn’t get the second one out.
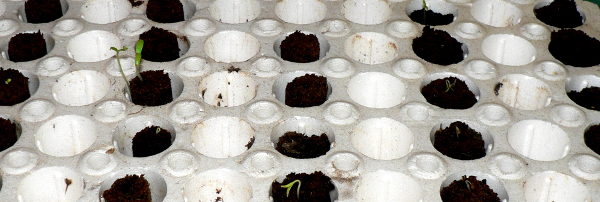
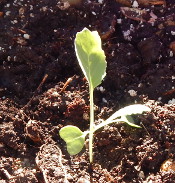
The big red cherry was pretty surprising. I took 6 pictures, then decided they were too dark and took more with increased light. During the short span of time between the first and second sets of pictures the little seedling went from having the tips of its leaves buried in the sponge, to being up as you see them n the picture.
4/11/2014 ~ Basil and all the varieties of pepper, except Ancho, sprouted only after the indoor night temperature was in the mid fifties and daytime temperatures were above 55*.
4/27/2014 ~ Today I transplanted the yellow pear tomatoes into a rolling tomato planter from Plow and Hearth… the best planters I’ve encountered. I thought I noted when I transplanted the big red cherry tomatoes, but apparently not, or… not here.